Green Wood Wren
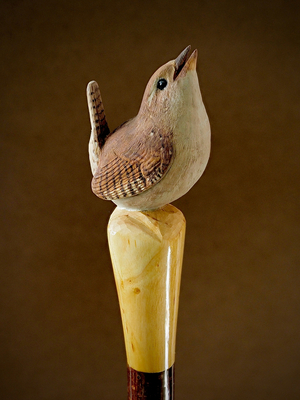
Unlike carving from seasoned timber this green wood project is a lot easier on the hands. Many of us use power to carve, including me quite often these days, but for this project mostly you just need a pruning saw and a sharp wood carving knife - All the other kit listed below is for processes other than carving. Ideal timber for the job is maple, sycamore or birch. You might prefer other timbers and since it’s a green wood carving project the timber will mostly be pleasantly soft compared to its seasoned counterpart. Birch like I’ve used here, is especially available - Seek out arborists who are forever managing birch outgrowing people’s gardens, or you’ll find it’s easily cadged from foresters working on plantations the country over.
Project Materials
- Green (fresh unseasoned) timber – fine grained light coloured wood like birch or maple
- Coppice shaft – A stick of hazel is my preference
- Spirit Wood Stains: ‘Wood colours’ and ‘Rainbow colours’ (Chestnut Products Ltd.)
- Clear methylated spirits (regular purple meths if you can’t get clear)
- Aerosol sanding sealer
- Exterior matt acrylic varnish
- Exterior gloss varnish
- Fast cure epoxy adhesive
Tools required
- Small hand axe/hatchet or froe
- Pruning or other fast cutting hand saw
- 13mm or 14mm brad point bit
- Fine wood rasp for making peg on end of shaft
- Fine flush cut or pull saw for easing the joint
- 80 grit and 240grit sandpaper
- Brush for varnishing stick
- Heat gun or your chosen tool for straightening the shaft
- Wood carving knife e.g. Mora 120 or 106
- 2B Pencil (I prefer a propelling pencil)
- For cutting eye sockets - 2 or 3mm No12 micro gouge or 3mm round burr
- Small band saw - Not absolutely necessary, but it makes life easier.
- Paint palette with wells
- Small round artists brushes
- Design patterns – https://raifkillips .com/make/green-wood-wren/downloads/
Care
- Wear nitrile gloves or similar, to keep glue and stain off your hands.
- Consider wearing carving gloves if you are inexperienced using a carving knife.
- Keep your work area ventilated when using spirit wood stain or any materials with VOCs (Volatile Organic Compounds). Or work outside if conditions permit.
- Secure the bottles of stain in a holder of some sort OR at least put them in the middle of a large tray when using. It’s easy to knock an unsecured bottle over and the resulting spill will at best, cause havoc.
Step 1
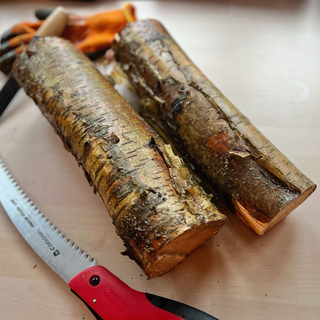
Cadge a small log of birch from an arborist or forester. A log as little as 5 inches diameter can yield a large enough piece of wood to work with. You’re only after a prepared billet 150mm (l) x 50mm (w) x 40mm (d).
Step 2
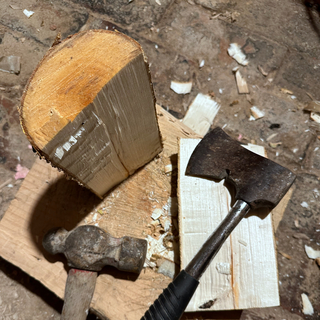
Split the log down the middle with a froe or hatchet. If necessary, tidy the split face with axe, saw, gouges or draw knife. You are after a face that isn’t twisted
Cut one end of the log so the face is smooth, flat, and as close to 90deg transverse to the length as you can manage. This will form the joint face.
If you can’t cut a clean joint face with the saw, you can use a sanding machine to tidy your saw cut; or wait until you do your dowel join and tidy it then.
Step 3
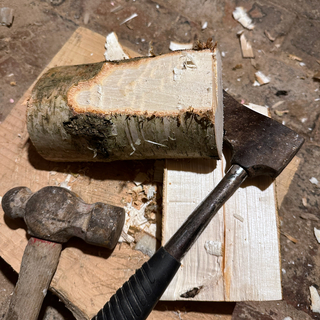
Roughly axe a flat face parallel to the split face.
If the timber is wide enough, square off the other two sides.
A band saw can make light of this work; though bare in mind, the more irregular the piece of timber the more technically challenging it is to use a band saw.
Step 4
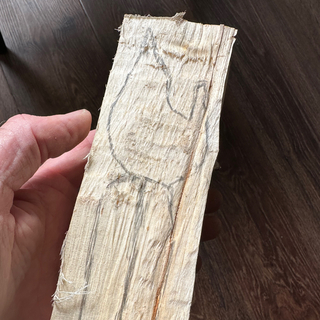
Draw the design outline onto the split face of the timber, following the grain and perpendicular to the cut joint face.
If you want them, the design profiles are available to download from https://raifkillips .com/make/green-wood-wren/downloads/
Step 5
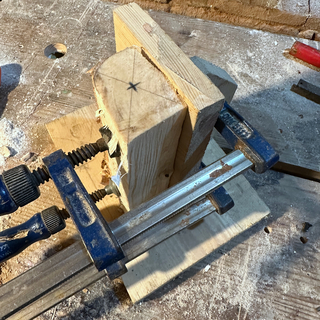
Extend the side profile centre line onto the joint face and mark it. Find the centre of the full thickness of the billet for the mortice and mark that to bisect the previous centre mark.
Clamp the timber so the joint face is horizontal.
Step 6
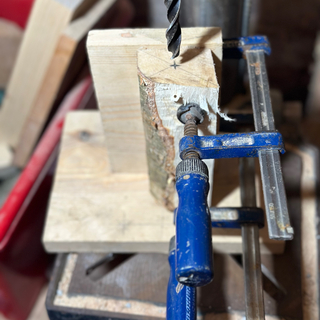
At the marked centre for the mortice, use a 13 or 14mm brad bit to drill the mortice hole 60mm deep perpendicular to the joint face.
You can probably see I use a drill press here, but with care you can use a hand drill.
You may have to tidy the hole later when the carving has dried – drilling green wood like this leaves a ragged hole.
Step 7
At this point I prepare a shaft. Then form the dowel on its end to fit the carved wren top. With the ‘peg’ on the shaft made, I do a quick dry fit-up, being careful not to split the drilled block - Push the carving on to the peg too hard and the carving will split.
When you are happy things are lining up, with a pencil, lightly mark the profile of the shaft’s circumference onto the drilled block so you can see how much material to remove in the carving. And before you separate block from shaft, pop a bit of low tack masking tape on the shaft at the joint and put a mark on block and shaft so you can realign the two later. ( See my article on creating a good dowel joint: https://raifkillips.com/make/dowel-joint/ )
Step 8
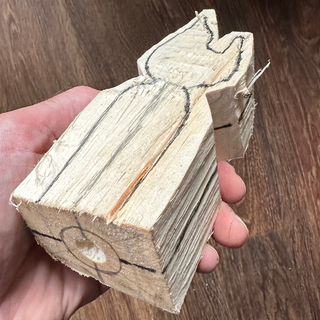
If the dry fit-up reveals no issue with alignment, like a wonky dowel or mortice, it’s time to block out the basic shape. The easiest way is using a band saw, but a pruning saw can be made to serve the same purpose. Because this is green wood, you might even carve the whole thing with just a knife, but my hands aren’t up to that anymore. I use a band saw.
Step 9
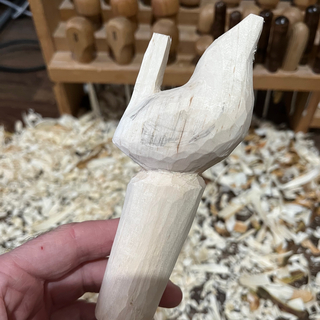
Once blocked out, carve away material until you have the basic shape. Leave the beak solid with plenty of excess material and leave the wings with what looks like too much thickness – a good 4mm each side – the bird may look too broad.
Leave the carving to dry. DO NOT attempt to speed up drying else the timber may check. If it isn’t going to upset anyone, just leave the carving on a shelf in your lounge for a week, out of the sun.
Step 10
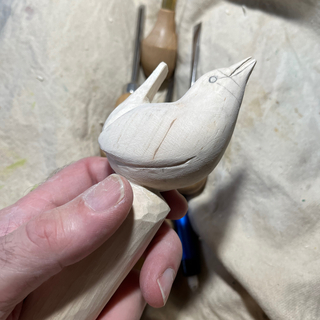
When the timber is dry and you have the basic shape, sand the bird smooth with 240grit paper so it will take a clear pencil line. Using a combination of measurements from the design templates, and layout marks - pencilled on alignment rings and projection lines - draw in the beak and eyes. Dividers, or a compass and sharp pencil are useful for taking distance measurements.
After draw the beak, carve a shallow groove to separate the upper and lower mandible. This can be done with a V-gouge or a carving knife – It’s easiest with the V-gouge.
Step 11
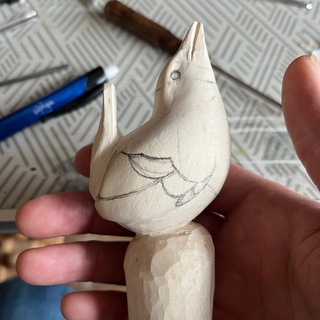
Mark the wings and draw on the feather groups.
Step 12
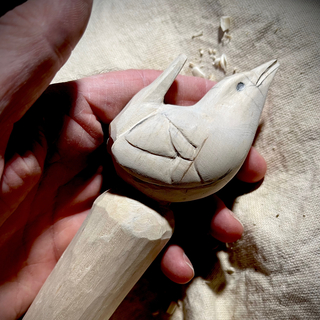
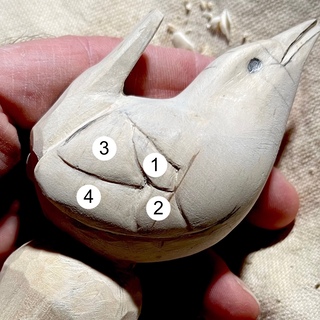
With a knife and, if you have them, gouges, cut in the simple outline of the feather groups. You are aiming to have the feather groups of the wings stacked so that the primaries are lowest or closest to the body. You can do this by first carving the whole wing surface (see illustration below areas 1, 2, 3 and 4) down a millimetre below the mantle; then redraw the wing feather groups; cut another millimetre or so from the primary coverts (area 2) to leave the secondary covets (area 1); carve the remaining area, the flight feathers (areas 2 and 3) so they sit lower than all the covert feathers (areas 1 and 2). Finally, draw and carve a separation line to leave the primary feathers (area 4) below the secondaries (area 3). You now have the main feather groups. Round and smooth them with fine sandpaper.
Step 13
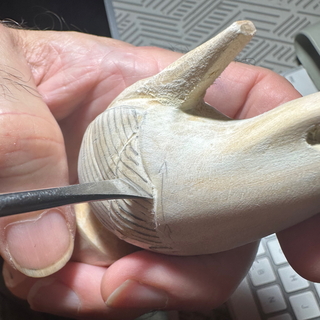
Mark in the individual covet and flight feathers. You are aiming for a good impression of the bird not anatomical perfection.
Carve in the feathers with a carving knife, craft knife or small skew gouge. I start at the first feather of the primary coverts and work up the wing. When all the coverts are cut I move on to the primaries and finally the secondaries.
The technique is to make a stop cut a good millimetre deep, following the leading edge of a feather line. Then make a shallow cut up to and following the stop cut, removing a thin sliver to leave a feather shape.
If you don’t want torn edges to these cuts, use a very sharp knife.
Step 14
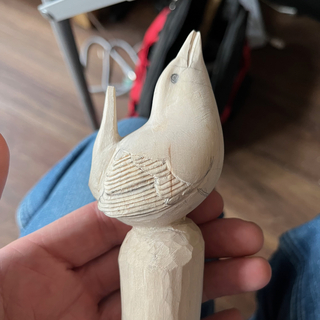
If needs be, tidy any feather edges with fine grit paper, a diamond bit, or whichever method you prefer for refining detail.
Step 15
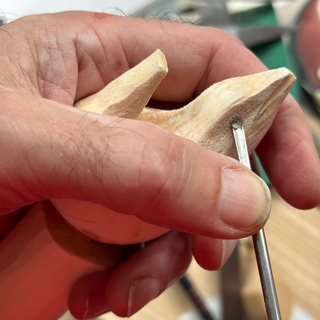
Cut the eye sockets with a 2mm No.8 or 3mm No.9 gouge, or if you have a rotary tool, use a diamond or tungsten bit to bore the eye sockets. They need to be 4mm diameter and at least 4 or 5mm deep. Flare the edges of the eye sockets - they shouldn’t have hard square edges but instead should round over and merge into the surface of the head.
Step 16
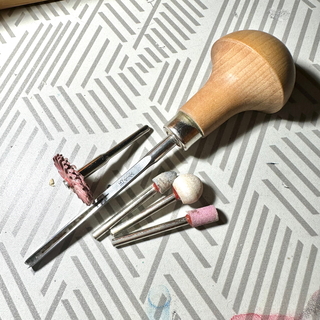
Use a V-gouge or a rotary tool with a variety of bits e.g. diamond inverted cone, small ball, small cylinder, and rounded cone shape stones, to develop feather shaping and texture on the body and underside of the tail.
Don’t bother attempting to put individual feather barbs on the flight feathers or the tail feathers.
Step 17
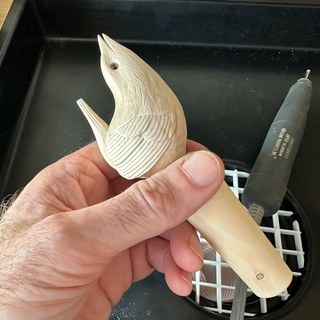
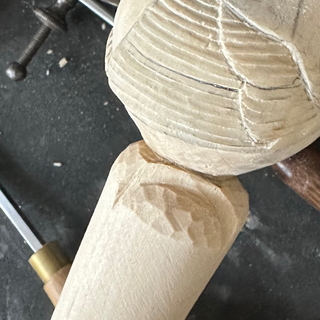
Notice the carving at the feet is minimal, just subtle edges, one to the left and right where the body meets the wood below. I don’t even carve separation of the two feet. Of course, there’s nothing to stop you carving the feet with separate toes, claws ‘n’ al’.
Step 18
Prepare some 4mm diameter eyes. You can use taxidermy glass eyes, carve eyes in place, or make your own. See this page to make your own eyes
Step 19
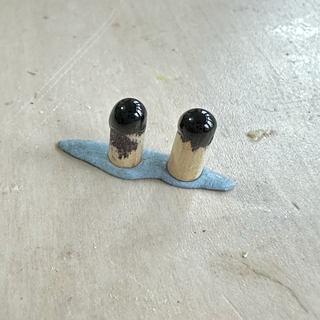
Insert the eyes with either a few drops of glue or, if you want an eye ring, some black epoxy putty – Milliput. I prefer to create an eye ring.
Don’t get glue or Milliput on the feather surface. Clean away any contamination otherwise it will act as a mask for the colour to be added in the next steps.
Step 20
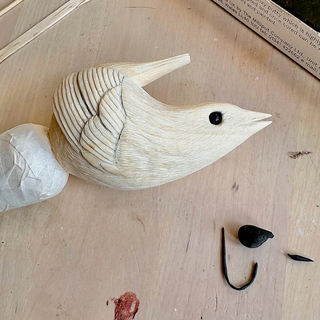
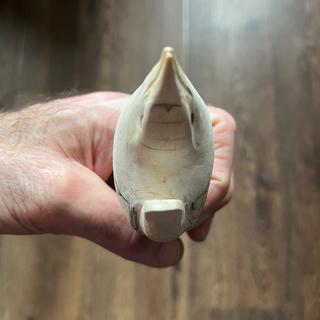
Just before moving on to applying the colour, refine the beak using careful knife cuts. You are after the impression of a beak, not a super realistic one. A wren’s beak is very fine, and one carved to match won’t last two seconds if like me you use your sticks and don’t reserve them for display. I carve a line, visually separating the top and bottom mandible but don’t carve all through – I leave them joined. A little careful painting will help define the shape later.
Step 21
Prepare the carving for painting by masking all the timber below the bird, including the ‘feet’.
Step 22
Now comes what for many will be the new bit – painting with wood stain. If you'd like to follow my method of painting the carving with colour wood stains, see the instructions in this article.
Step 23
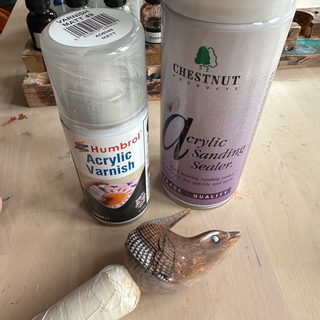
When you are satisfied with your colour rendering of the bird, you should mask the eyes in preparation for sealing the carving. To seal the carving I use two aerosol products - Sanding sealer (acrylic or celulose will do) and exterior matt acrylic varnish (I use Humbrol AD6049).
Step 24
With the carving complete and sealed it's time to glue up the carved top to the shank securing the joint completed in step 7 above. If done correctly, at this stage all you need do is add glue and push the carving onto the shaft. For speed I use rapid cure epoxy, but you may prefer an alternative adhesive - The only criteria is the glue should be strong, flexible and waterproof.
Note
The exact sequence of steps isn’t necessarily critical, so "no panic" if you find yourself working on something that is yet to come up in this article. I really would recommend however, putting the eyes in before applying colour to the head and body. But, if for instance you have opted to carve eyes as integral to the bird rather than as separate pieces, once the beak is finished, it’s time to put on the colour.
If you have questions about anything in this article please go to my Facebook page and ask them in comments below the corresponding post. I prefer answering questions there because the information is available to everyone. You may find your query has already been answered too. Facebook post with chat and comments
Tools and Further Reading
Like a lot of makers I'm inclined to turn my hand to anything if I think the time and effort will give me sufficient return on my investment. Just such a case was making my own micro gouges. I use these for carving a lot of detail and find them superior to anything off the peg and more precise than power carving. Made to my own design these tools can make a lot of jobs easier than they might otherwise be and for me give a better result. Below are links to instructions I used to make my own micro carving tools: